Because it's the easiest way to make a photo better! I've seen too many shots ruined by a distracting element on the edge of a photo that could have easily been cut out. In photography, simplicity is crucial - some good advice I've read when composing (or cropping) is that you should not think 'what can I fit in?' - you should think 'what can I leave out?'. The less there is in a photo, and the more well placed it is, the more impact it will have.
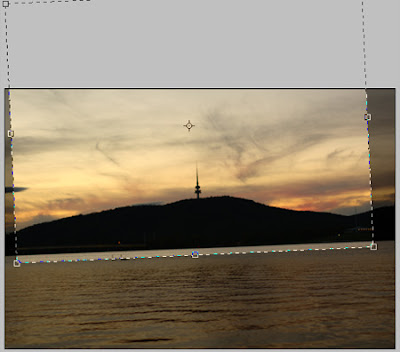
The most important part of cropping a photo, especially if it is a landscape or urban shot, is to level a horizon. Here's an example:

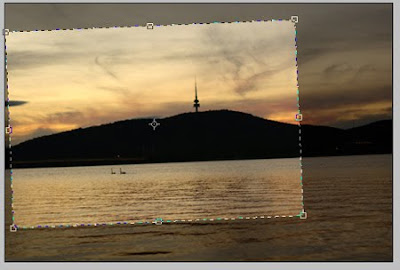
A decent shot, with some potential - but it's easy to see that the horizon is crooked. Lets fix it! Use the crop tool, found on the toolbar on left. As a rule I usually crop keeping my camera's 4272x2848 pixels, entered at the top. I like to do this to keep all my photos at the same ratio, which is best for prints. Others will do it differently. Anyway - back to the photo, the horizon needs to be levelled. Drag the crop across until you get decent width across the photo. Then hover your mouse across one of the bottom corners of the photo and you should see the mouse turn into a small rotation symbol. You can now rotate the crop to level with the horizon:

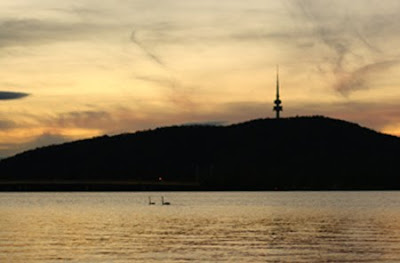
Once you have the crop levelled, you can choose the size and position of your new composition. It is good to have the interesting parts of the photo at the points where thirds of the photo intersect - known as the rule of thirds (http://en.wikipedia.org/wiki/Rule_of_thirds). So I will crop to this:

The tower is placed at the intersection of 2/3 to the right and 2/3 to the top of the photo - pleasing to the eye. Behold, a much better photo!:

Have a big play around with crops on photos that you take and see what pleases your eye. Remember, horizons level, less is more, rule of thirds, you can't go wrong!
Cheers
Tal

No comments:
Post a Comment