I find this editing process relevant for most types of photography, but tend to enjoy its results a lot more on portrait and landscape shots.
When you open the gradient tool on the left menu in photoshop (a rectangle that fades black to white, could be hidden under the paint bucket tool if you can't find it), you have 5 options at the top which look like this:

From left to right, you have linear, radial, angular, reflected and diamond. I've only ever found the linear and radial options useful. I will show an example for each of these three following.
First, the linear gradient. This is a fantastic option for landscapes where you have a simple sky and land or sky and water set up, and either the sky or ground needs to be lightened, darkened, saturated, sharpened or anything else.
The best way to even out sky and ground in a photo is always with an ND grad filter (see accessories). If that's not available, or you've used an ND grad and still need some more adjustment, this helps. Usually I will use both an ND grad (or 2) and this tool as a combination.
This is a photo I took recently at airlie beach, using an ND4 grad filter (to darken sky, lighten water) and an ND8 filter (darkens all of the photo, slowing the shutter speed to smooth water). This was shot at 5 seconds, f/22 at ISO100 - the smallest ISO and largest f/number giving the slowest shutter speed possible, which smooths out water. This was at 10mm on my sigma 10-20mm.
As a general rule, the sky will pretty much always be lighter than the ground, so I use a setup like this very often. This is the shot straight off the camera, a bit red/purpley as that is the effect of the plastic filters. I don't mind the effect though as it gives it quite a cool sunset look:
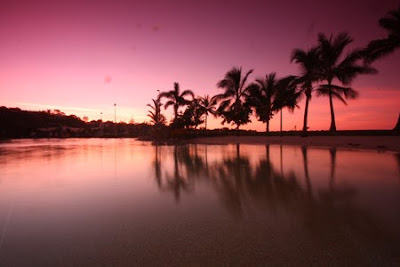 Never mind the dust spots in the top left of the photo - the filters are a bit dirty. I will get rid of those at the end using the clone stamp tool, google it if you're not sure. Next thing to do - it's a nice shot but there is some saturation and light lost in the water in this photo. What I want to do is subtly lighten and saturate the bottom half of the photo to even it out nicely.
Here we go! Select the gradient tool -> linear gradient (the first one out of 5). Hit the 'q' button to enter quick mask mode. What you'll need to do now is drag the cursor perpendicular to the area boundary that you want to change. Drag this from the area you want kept the same, towards the area you want to edit. The longer the drag distance, the more graduated your edit will be. The boundary between water and sky in this shot is quite obvious, so let's not drag too far:
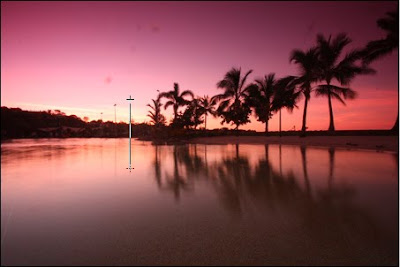 In other circumstances, or when I want the edit to be less obvious, I might drag the cursor all the way from top to bottom. As a simple horizontal sky/water arrangement, this wasn't needed.
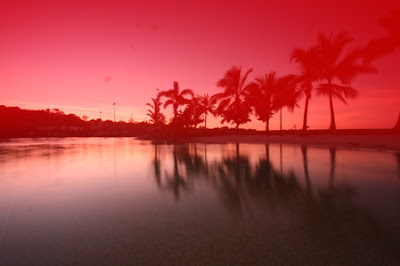
When you release the cursor, the photo will look like this. The red area is the area that won't be edited, the clear area will be:
 Hit 'q' again to escape. Now your photo will have a selected zone which you can edit:
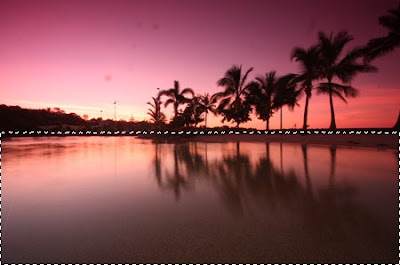 Now all actions you make will only be made on this gradiated section - even though it looks like a rectange, the top of it is graduated, so what you do will be very subtle and not look like it was overprocessed. I used levels to brighten midtones, and added some saturation to the magentas to bring the purple up. I deselected the area, and used levels again on the photo as a whole, now that it was evened out. After clone stamping out the dust spots and also the distracting tree at top right corner, voila! A nice and evenly exposed and saturated photo, from top to bottom:
 It's not a massive change - but that's the thing, it never should be. The best way to edit is to make it look like you didn't at all, to make subtle changes that vastly improve the shot without the viewer noticing. The gradient tool is massive for me in making this happen.
Check out part 2 for usage examples of the radial gradient!
Cheers
Tal
No comments:
Post a Comment